Windows 7 have a new feature that enable you set permission on shared folder with Windows Live user. This feature valid only with HomeGroup, you can share a folder with one or more Windows Live user by click Link online IDs in User Account, see figure below
Next, click Link online ID in Online ID column Next, type your Windows Live ID and password, after this click Sign in
 Here is my picture that display a Windows Live ID
Since here, when you right click to share 1 folder, you can add share permission with Windows Live ID user similar with other users.
You can add many Windows Live ID as possible.
Aug 31, 2009
Linking my online IDs with my Windows user account
Aug 27, 2009
MS Press Free E-book: Understanding Microsoft Virtualization Solutions

Understanding Microsoft Virtualization Solutions
By Mitch Tulloch with the Microsoft Virtualization Teams
ISBN: 9780735693371
This guide will teach you about the benefits of the latest virtualization technologies and how to plan, implement, and manage virtual infrastructure solutions. The technologies covered include: Windows Server 2008 Hyper-V, System Center Virtual Machine Manager 2008, Microsoft Application Virtualization 4.5, Microsoft Enterprise Desktop Virtualization, and Microsoft Virtual Desktop Infrastructure.
View Chapter 1: Microsoft's Virtualization Solution
or
Sign up to download the entire e-book (PDF, 14.4 MB).
![]()
Note: You will need to temporarily allow pop-up windows for the download
Aug 26, 2009
Download System Center Virtual Machine Manager 2008 R2 – Evaluation

Overview
System Center Virtual Machine Manager 2008 R2 (VMM) is a comprehensive management solution for the virtualized data center. It enables increased physical server utilization, centralized management of virtual machine infrastructure, and rapid provisioning of new virtual machines by the administrator, delegated administrator, and authorized end users.
VMM 2008 R2 can manage all the platforms managed by VMM 2008 and adds support for Windows Server 2008 R2 with Hyper-V.
Windows Server 2008 R2 includes significant feature improvements to Hyper-V. VMM 2008 R2 leverages these new platform enhancements and extends the feature set of VMM 2008.
Windows Server 2008 R2 Hyper-V Host Management
Feature Bullet Summary:
VMM 2008 R2 can manage all the platforms managed by VMM 2008 and adds support for Windows Server 2008 R2 with Hyper-V.
Windows Server 2008 R2 includes significant feature improvements to Hyper-V. VMM 2008 R2 leverages these new platform enhancements and extends the feature set of VMM 2008.
Windows Server 2008 R2 Hyper-V Host Management
- VMM 2008 R2 creates and manages virtual machines running on Windows Server 2008 R2 Hyper-V hosts. When you add a host that is running Windows Server 2008 R2 that does not have Hyper-V enabled, VMM 2008 R2 automatically enables the Hyper-V role on the host.
- VMM 2008 R2 supports the following new features of Windows Server 2008 R2:
- Live migration between Windows Server 2008 R2 clustered hosts. With live migration, you can migrate a virtual machine from one node of a Windows Server 2008 R2 failover cluster to another node in the same cluster without any downtime. Because the virtual machine does not experience any downtime, the move is completely transparent to the users that are connected to the virtual machine.
- Network optimization detection during virtual machine placement. VMM 2008 R2 supports both Virtual Machine Queue (VMQ) and TCP Chimney, which are Windows Server 2008 R2 features that improve network performance for virtual machines.
- Network adapters that support the VMQ feature are able to create a unique network queue for each virtual network adapter and then connect that queue directly to the virtual machine’s memory. This connection routes packets directly from the hypervisor to the virtual machine, bypassing much of the processing in the virtualization stack.
- Network adapters that support the TCP Chimney feature are able to offload the processing of network traffic from the networking stack. Both of these features increase network performance and reduce CPU utilization.
- Hot addition and removal of virtual hard disks (VHDs). In Windows Server 2008 R2, Hyper-V allows users to add and remove VHDs from a virtual machine while it is running.
Feature Bullet Summary:
- Live migration
- Clustered Shared Volume (CSV) support that enables multiple Highly Available Virtual Machines (HAVM) per LUN.
- Hot add of storage
- Support for VMware vSphere 4 (VMware VI3 feature parity only)
- SAN Migration into and out of clustered hosts
- Processor flexibility
- Network optimization
- Quick storage migration
- Maintenance mode for hosts
- Support for third party cluster file system, Sanbolic Melio FS
- Support for third party storage class resource, Veritas Storage Foundation for Windows
- Expanded support for iSCSI SANs
- Support for VMware port groups for virtual switches
- Support for Virtual Machine permissions assigned in Hyper-V
- Dynamic policy based load balancing
System Requirements
- Supported Operating Systems: Windows Server 2008 Datacenter; Windows Server 2008 Enterprise; Windows Server 2008 R2; Windows Server 2008 Standard
Download: System Center Virtual Machine Manager 2008 R2
Exchange Server 2007 Service Pack 2
Brief Description
The new capabilities of Exchange Server 2007 deliver the advanced protection your company demands, the anywhere access your people want, and the operational efficiency you need.
Overview
Microsoft Exchange Server 2007 Service Pack 2 (SP2) has been designed specifically to help meet the challenges of any business and the needs of all the different groups with a stake in the messaging system. Exchange Server 2007 SP2 is a mission-critical communications tool that enables employees to be more productive and access their information anywhere and anytime while providing a messaging system that enables rich, efficient access to e-mail, calendar items, voice mail, and contacts. For the administrator, Exchange Server 2007 SP2 provides advanced protection options against e-mail security threats, such as spam and viruses, as well as the tools to help manage internal compliance and high availability needs. For an overview of the new features that are available in Exchange Server 2007 SP2, see "What's New in Exchange Server 2007 SP2".
Download: Exchange Server 2007 Service Pack 2
Download Yahoo! Messenger 10 Beta (Official Standalone Offline Setup Installer Links)
Yahoo! Messenger blog details new features in Yahoo! Messenger 10 Beta:
- High-quality video calls
- New “Y! Updates” view of contact list
- Find more to chat about
- All-new Yahoo! Insider
- Change your language easily
- New ways to sort your contacts
- New icons in the IM window

Yahoo! Messenger 10 Beta version 10.0.0.525-us (for English version) can be downloaded from http://messenger.yahoo.com/download/winbeta/, or using the following direct download links to the official Yahoo! server to download standalone offline installers for Yahoo! Messenger 10 Beta.
US English: ymsgr1000_525_us.exe
America
Argentina: ymsgr1000_525_ar.exe
Brazil: ymsgr1000_525_br.exe
Chile: ymsgr1000_525_cl.exe
Columbia: ymsgr1000_525_co.exe
Mexico: ymsgr1000_525_mx.exe
Peru: ymsgr1000_525_pe.exe
Venezuela: ymsgr1000_525_ve.exe
Yahoo! Telemundo (Latin America Spanish): ymsgr1000_525_e1.exe
Europe
France: ymsgr1000_525_fr.exe
Germany: ymsgr1000_525_de.exe
Italy: ymsgr1000_525_it.exe
Spain: ymsgr1000_525_es.exe
UK & Ireland: ymsgr1000_525_uk.exe
Oceanic
Australia & New Zealand: ymsgr1000_525_au.exe
Asia
India (English): ymsgr1000_525_in.exe
Indonesia: ymsgr1000_525_id.exe
Hong Kong (Chinese): ymsgr1000_525_hk.exe
Korea: ymsgr1000_525_kr.exe
Malaysia: ymsgr1000_525_my.exe
Philippines: ymsgr1000_525_ph.exe
Singapore: ymsgr1000_525_sg.exe
Taiwan (Traditional Chinese): ymsgr1000_525_tw.exe
Thailand: ymsgr1000_525_th.exe
Vietnam: ymsgr1000_525_vn.exe
Aug 22, 2009
Microsoft replaces the 70-640 for the 83-640
Microsoft replaces the 70-640 exam for the 083-640. For the new 83-640 test you remotely access a virtual machine. You are given a problem or a list of tasks and need to actually solve it on Server 2008. See this video for more detail
Virtual Lab Demo:
Aug 21, 2009
Licensing Microsoft Servers for Globalization (video)
I found this video at: Windows Virtualization Team Blog. This video is nice, it let's me know the defference between each editions of Windows Server 2008 about license, price and advantage.
Learn the licensing use rights for virtualizing Microsoft's server products, such as Windows Server, SQL, BizTalk and Exchange.
It also covers moving running instances (VMs) between servers using technologies such as System Center Virtual Machine Manager.
You should visit this blog frequently to update many information about technology.
Intel® Virtualization Technology List (Support Hyper-V)
My CPU is Intel E4400 is not listed in Intel Virtualization List. I buy this computer in 2007, E4400 is a new chip that inexpensive. I buy it, now when I learn Microsoft Technology, i see Hyper-V a new feature of Windows Server 2008. Unfotunantely, My CPU does not support this feature, I want to upgrade my CPU but money is big problem with me, so sad. Uhm, To check whether your CPU have support Hyper-V you can read previous post: How to check Intel and AMD Hyper-V Compatibility
Here is Intel® Virtualization Technology List. You can view this list to consider your CPU have listed: http://ark.intel.com/VTList.aspx
Aug 20, 2009
FREE Virtualization E-Learning Collection (#6319) for Exam Preparation (Saving 150$)
FREE Virtualization E-Learning Collection (#6319) for Exam Preparation
(A $150 Value)
Go to: http://go.microsoft.com/?linkid=9672264
Use code: 6839-F6Y7-7777
Get more training materials at: https://partner.microsoft.com/global/40090820
All the above are courtesy of Microsoft Core IO University – www.coreiouniversity.com – register with the code “THAOLV” and earn 250 reward points!
Free Juniper Certifications Exam
You can get maximum 4 vouchers and then use those vouchers to exam only below lists:
JN0-330 ---> Juniper Networks Certified Internet Specialist (JNCIS-SEC)
JN0-342 ---> Juniper Networks Certified Internet Associate (JNCIA-ER)
JN0-350 ---> Juniper Networks Certified Internet Specialist (JNCIS-ER)
JN0-400 ---> Juniper Networks Certified Internet Associate (JNCIA-EX)
Visit this link:
https://learningportal.juniper.net/juniper/user_fasttrack_home.aspxThey offering 100% discount guys. This time is valid until end of 2009. Hurry up!
I have no knowledge about Juniper. I post this to everyone who care!
E-book for Preparing MCTS 70-652 Exam: Windows Server 2008 Hyper-V Unleashed
![]()
Using the Hyper-V virtualization capabilities built into Windows Server 2008, organizations can slash costs for power, space, and maintenance, and dramatically improve IT flexibility at the same time. This is the first book to offer comprehensive, independent, real-world coverage of planning, designing, implementing, and supporting Windows Server 2008 Hyper-V virtualization environments. Authored by Rand Morimoto and Jeff Guillet¨Ctop consultants of Microsoft technologies with unsurpassed experience deploying Hyper-V in enterprise organizations¨Cthis book delivers start-to-finish guidance for every facet of your virtualization initiative.
Using the Hyper-V virtualization capabilities built into Windows Server 2008, organizations can slash costs for power, space, and maintenance, and dramatically improve IT flexibility at the same time. This is the first book to offer comprehensive, independent, real-world coverage of planning, designing, implementing, and supporting Windows Server 2008 Hyper-V virtualization environments. Authored by Rand Morimoto and Jeff Guillet¨Ctop consultants of Microsoft technologies with unsurpassed experience deploying Hyper-V in enterprise organizations¨Cthis book delivers start-to-finish guidance for every facet of your virtualization initiative.
*Leverage the experience from hundreds of real world implementations of Hyper-V and Virtual Machine Manager 2008 in your deployment of a virtualized server environment
*Implement best practices for planning, prototyping, and deploying Hyper-V¨Cincluding strategies, processes, and templates
*Install and configure Windows 2008 Server with Windows Hyper-V Services
*Provide guest operating systems ranging from Windows 2003 Server to Linux
*Administer Hyper-V Host Servers as standalone hosts or in multiple host environments
*Optimize Hyper-V Host Server and guest sessions, by efficiently allocating memory, processors, disk space, and other resources
*Move from basic server virtualization to a systematically managed virtual enterprise environment
*Use Virtual Machine Manager 2008 to centrally monitor all your Hyper-V hosts and guest sessions
*Quickly provision new guest images wherever and whenever you need them
*Implement reliable failover processes to overcome failures in guest sessions, host systems, or sites
*Troubleshoot problems with both Hyper-V hosts and guest operating systems
Download: http://www.mediafire.com/?yn05z0mzgqz
I recommend to use this book to prepare for 70-652 exam. This is good book for both exam and real use.
Aug 18, 2009
Challenge OSPF Scenario
Today, We will configure this OSPF Scenario in the figure and adding more requires


1. Basic Configuration on all Routers: Password, banner...
2. Configuring IP address, enable OSPF Routing, change bandwidth to fit the scenario.
Router(config)#hostname OSIRIS
OSIRIS(config)#no ip domain-lookup
OSIRIS(config)#line console 0
OSIRIS(config-line)#password cisco
OSIRIS(config-line)#login
OSIRIS(config-line)#exit
OSIRIS(config)#username thaolv password 0 thaolv
OSIRIS(config)#line vty 0 4
OSIRIS(config-line)#login local
OSIRIS(config-line)#exit
OSIRIS(config)#enable secret cisco
OSIRIS(config)#service password-encryption
OSIRIS(config)#banner motd #OSIRIS is configured by THAOLV#
On OSIRIS Router
OSIRIS(config)#interface lo0Verify by execute the command show ip route
*Mar 1 00:06:02.923: %LINEPROTO-5-UPDOWN: Line protocol on Interface Loopback0, changed state to up
OSIRIS(config-if)#ip address 1.1.1.1 255.255.255.255
OSIRIS(config-if)#interface f1/0
OSIRIS(config-if)#description F1/0 is connected to ISIS
OSIRIS(config-if)#ip address 172.12.12.1 255.255.255.0
OSIRIS(config-if)#no shutdown
OSIRIS(config-if)#
*Mar 1 00:07:41.091: %LINK-3-UPDOWN: Interface FastEthernet1/0, changed state to up
*Mar 1 00:07:42.091: %LINEPROTO-5-UPDOWN: Line protocol on Interface FastEthernet1/0, changed state to up
OSIRIS(config-if)#bandwidth 1000000
OSIRIS(config)#ip ospf authentication message-digest
OSIRIS(config-if)#ip ospf message-digest-key 1 md5 thaolv
OSIRIS(config)#interface f0/0
OSIRIS(config-if)#description F0/0 is connected to MA'AT
OSIRIS(config-if)#ip address 172.12.123.1 255.255.255.0
OSIRIS(config-if)#no shutdown
OSIRIS(config-if)#
*Mar 1 00:12:53.567: %LINK-3-UPDOWN: Interface FastEthernet0/0, changed state to up
*Mar 1 00:12:54.567: %LINEPROTO-5-UPDOWN: Line protocol on Interface FastEthernet0/0, changed state to up
OSIRIS(config-if)#ip ospf authentication message-digest
OSIRIS(config-if)#ip ospf message-digest-key 1 md5 thaolv
OSIRIS(config)#router ospf 1
OSIRIS(config-router)#network 172.12.12.0 255.255.255.0 area 0
OSIRIS(config-router)#network 172.12.123.0 255.255.255.0 area 0
OSIRIS(config-router)#network 1.1.1.1 255.255.255.255 area 0
OSIRIS(config-router)#passive-interface lo0
OSIRIS(config-router)#auto-cost reference-bandwidth 1000
% OSPF: Reference bandwidth is changed.
Please ensure reference bandwidth is consistent across all routers.
OSIRIS(config-router)#
OSIRIS#show ip route
Codes: C - connected, S - static, R - RIP, M - mobile, B - BGP
D - EIGRP, EX - EIGRP external, O - OSPF, IA - OSPF inter area
N1 - OSPF NSSA external type 1, N2 - OSPF NSSA external type 2
E1 - OSPF external type 1, E2 - OSPF external type 2
i - IS-IS, su - IS-IS summary, L1 - IS-IS level-1, L2 - IS-IS level-2
ia - IS-IS inter area, * - candidate default, U - per-user static route
o - ODR, P - periodic downloaded static route
Gateway of last resort is not set
1.0.0.0/32 is subnetted, 1 subnets
C 1.1.1.1 is directly connected, Loopback0
2.0.0.0/32 is subnetted, 1 subnets
O 2.2.2.2 [110/2] via 172.12.12.2, 00:03:08, FastEthernet1/0
3.0.0.0/32 is subnetted, 1 subnets
O 3.3.3.3 [110/3] via 172.12.12.2, 00:03:08, FastEthernet1/0
172.12.0.0/24 is subnetted, 3 subnets
C 172.12.12.0 is directly connected, FastEthernet1/0
O 172.12.23.0 [110/2] via 172.12.12.2, 00:03:08, FastEthernet1/0
C 172.12.123.0 is directly connected, FastEthernet0/0
On ISIS Router
ISIS(config)#interface lo0Verify by execute the command show ip route
ISIS(config-if)#ip add
*Mar 1 00:17:03.263: %LINEPROTO-5-UPDOWN: Line protocol on Interface Loopback0, changed state
ISIS(config-if)#ip address 2.2.2.2 255.255.255.255
ISIS(config-if)#interface F1/0
ISIS(config-if)#description F1/0 is connected to OSIRIS
ISIS(config-if)#ip address 172.12.12.2 255.255.255.0
ISIS(config-if)#no shutdown
ISIS(config-if)#
*Mar 1 00:18:22.251: %LINK-3-UPDOWN: Interface FastEthernet1/0, changed state to up
*Mar 1 00:18:23.251: %LINEPROTO-5-UPDOWN: Line protocol on Interface FastEthernet1/0, changed state to up
ISIS(config-if)#bandwidth 1000000
ISIS(config-if)#ip ospf authentication message-digest
ISIS(config-if)#ip ospf message-digest-key 1 md5 thaolv
ISIS(config)#interface F2/0
ISIS(config-if)#description F2/0 is connected to SETH
ISIS(config-if)#ip address 172.12.23.2 255.255.255.0
ISIS(config-if)#no shutdown
ISIS(config-if)#
*Mar 1 00:20:36.059: %LINK-3-UPDOWN: Interface FastEthernet2/0, changed state to up
*Mar 1 00:20:37.059: %LINEPROTO-5-UPDOWN: Line protocol on Interface FastEthernet2/0, changed state to up
ISIS(config-if)#ip ospf authentication message-digest
ISIS(config-if)#ip ospf message-digest-key 1 md5 thaolv
ISIS(config-if)#bandwidth 1000000
ISIS(config)#interface F0/0
ISIS(config-if)#description F0/0 is connected to MA'AT
ISIS(config-if)#ip address 172.12.123.2 255.255.255.0
ISIS(config-if)#no shutdown
ISIS(config-if)#
*Mar 1 00:22:13.051: %LINK-3-UPDOWN: Interface FastEthernet0/0, changed state to up
*Mar 1 00:22:14.051: %LINEPROTO-5-UPDOWN: Line protocol on Interface FastEthernet0/0, changed state to up
ISIS(config-if)#ip ospf authentication message-digest
ISIS(config-if)#ip ospf message-digest-key 1 md5 thaolv
ISIS(config)#router ospf 1
ISIS(config-router)#network 172.12.12.0 255.255.255.0 area 0
ISIS(config-router)#network 172.12.123.0 255.255.255.0 area 0
*Mar 1 00:23:37.751: %OSPF-5-ADJCHG: Process 1, Nbr 1.1.1.1 on FastEthernet1/0 from LOADING to FULL, Loading Done
ISIS(config-router)#network
*Mar 1 00:23:42.131: %OSPF-5-ADJCHG: Process 1, Nbr 1.1.1.1 on FastEthernet0/0 from LOADING to FULL, Loading Done
% Incomplete command.
ISIS(config-router)#network 172.12.23.0 255.255.255.0 area 0
ISIS(config-router)#network 2.2.2.2 255.255.255.255 area 0
ISIS(config-router)#passive-interface lo0
ISIS(config-router)#auto-cost refe
ISIS(config-router)#auto-cost reference-bandwidth 1000
% OSPF: Reference bandwidth is changed.
Please ensure reference bandwidth is consistent across all routers.
ISIS#show ip route
Codes: C - connected, S - static, R - RIP, M - mobile, B - BGP
D - EIGRP, EX - EIGRP external, O - OSPF, IA - OSPF inter area
N1 - OSPF NSSA external type 1, N2 - OSPF NSSA external type 2
E1 - OSPF external type 1, E2 - OSPF external type 2
i - IS-IS, su - IS-IS summary, L1 - IS-IS level-1, L2 - IS-IS level-2
ia - IS-IS inter area, * - candidate default, U - per-user static route
o - ODR, P - periodic downloaded static route
Gateway of last resort is not set
1.0.0.0/32 is subnetted, 1 subnets
O 1.1.1.1 [110/2] via 172.12.12.1, 00:03:57, FastEthernet1/0
2.0.0.0/32 is subnetted, 1 subnets
C 2.2.2.2 is directly connected, Loopback0
3.0.0.0/32 is subnetted, 1 subnets
O 3.3.3.3 [110/2] via 172.12.23.3, 00:03:57, FastEthernet2/0
172.12.0.0/24 is subnetted, 3 subnets
C 172.12.12.0 is directly connected, FastEthernet1/0
C 172.12.23.0 is directly connected, FastEthernet2/0
C 172.12.123.0 is directly connected, FastEthernet0/0
On SETH Router
SETH(config)#interface lo0Verify by execute the command show ip route
SETH(config-if)#
*Mar 1 00:25:16.795: %LINEPROTO-5-UPDOWN: Line protocol on Interface Loopback0, changed state to up
SETH(config-if)#ip address 3.3.3.3 255.255.255.255
SETH(config-if)#interface F1/0
SETH(config-if)#description F1/0 is connected to ISIS
SETH(config-if)#ip address 172.12.23.3 255.255.255.0
SETH(config-if)#no shut
SETH(config-if)#
*Mar 1 00:26:06.383: %LINK-3-UPDOWN: Interface FastEthernet1/0, changed state to up
*Mar 1 00:26:07.383: %LINEPROTO-5-UPDOWN: Line protocol on Interface FastEthernet1/0, changed state to up
SETH(config-if)#bandwidth 1000000
SETH(config-if)#ip ospf authentication message-digest
SETH(config-if)#ip ospf message-digest-key 1 md5 thaolv
SETH(config-if)#interface F0/0
SETH(config-if)#description F0/0 is connected to MA'AT
SETH(config-if)#ip address 172.12.123.3 255.255.255.0
SETH(config-if)#no shut
SETH(config-if)#
*Mar 1 00:27:21.883: %LINK-3-UPDOWN: Interface FastEthernet0/0, changed state to up
*Mar 1 00:27:22.883: %LINEPROTO-5-UPDOWN: Line protocol on Interface FastEthernet0/0, changed state to up
SETH(config-if)#ip ospf authentication message-digest
SETH(config-if)#ip ospf message-digest-key 1 md5 thaolv
SETH(config-if)#exit
SETH(config)#router ospf 1
SETH(config-router)#network 172.12.123.0 255.255.255.0 area 0
SETH(config-router)#network 172.12
*Mar 1 00:28:39.975: %OSPF-5-ADJCHG: Process 1, Nbr 2.2.2.2 on FastEthernet0/0 from LOADING to FULL, Loading Done.23.0 2
*Mar 1 00:28:41.887: %OSPF-5-ADJCHG: Process 1, Nbr 1.1.1.1 on FastEthernet0/0 from LOADING to FULL, Loading Done55
% Incomplete command.
SETH(config-router)#network 172.12.23.0 255.255.255.0 area 0
SETH(config-router)#network 3.3.3.3 255.25
*Mar 1 00:28:57.647: %OSPF-5-ADJCHG: Process 1, Nbr 2.2.2.2 on FastEthernet1/0 from LOADING to FULL, Loading Done5.255
% Incomplete command.
SETH(config-router)#network 3.3.3.3 255.255.255.255 area 0
SETH(config-router)#passive-interface lo0
SETH(config-router)#auto-cost re
SETH(config-router)#auto-cost reference-bandwidth 1000
% OSPF: Reference bandwidth is changed.
Please ensure reference bandwidth is consistent across all routers.
SETH#show ip routeNote: To show neighbor to view DR ad BDR you can execute the command show ip ospf neighbor
Codes: C - connected, S - static, R - RIP, M - mobile, B - BGP
D - EIGRP, EX - EIGRP external, O - OSPF, IA - OSPF inter area
N1 - OSPF NSSA external type 1, N2 - OSPF NSSA external type 2
E1 - OSPF external type 1, E2 - OSPF external type 2
i - IS-IS, su - IS-IS summary, L1 - IS-IS level-1, L2 - IS-IS level-2
ia - IS-IS inter area, * - candidate default, U - per-user static route
o - ODR, P - periodic downloaded static route
Gateway of last resort is not set
1.0.0.0/32 is subnetted, 1 subnets
O 1.1.1.1 [110/3] via 172.12.23.2, 00:00:21, FastEthernet1/0
2.0.0.0/32 is subnetted, 1 subnets
O 2.2.2.2 [110/2] via 172.12.23.2, 00:00:21, FastEthernet1/0
3.0.0.0/32 is subnetted, 1 subnets
C 3.3.3.3 is directly connected, Loopback0
172.12.0.0/24 is subnetted, 3 subnets
O 172.12.12.0 [110/2] via 172.12.23.2, 00:00:21, FastEthernet1/0
C 172.12.23.0 is directly connected, FastEthernet1/0
C 172.12.123.0 is directly connected, FastEthernet0/0
ISIS#show ip ospf neighborYou see OSIRIS Router appear as DR because i configure begin with OSIRIS Router. To know why you can view previous post Determining DR and BDR in OSPF Router .To change DR and BDR you can shutdown lo0 interface on OSIRIS Router and return by no shutdown command. Next you execute the command clear ip ospf process on any Router.
Neighbor ID Pri State Dead Time Address Interface
3.3.3.3 1 FULL/BDR 00:00:38 172.12.23.3 FastEthernet2/0
1.1.1.1 1 FULL/DR 00:00:36 172.12.123.1 FastEthernet0/0
3.3.3.3 1 FULL/DROTHER 00:00:31 172.12.123.3 FastEthernet0/0
1.1.1.1 1 FULL/DR 00:00:31 172.12.12.1 FastEthernet1/0
You can verify authentication in OSPF by execute the command show ip ospf interface
OSIRIS#show ip ospf interface F1/0Any Question is welcome here.
FastEthernet1/0 is up, line protocol is up
Internet Address 172.12.12.1/24, Area 0
Process ID 1, Router ID 1.1.1.1, Network Type BROADCAST, Cost: 1
Transmit Delay is 1 sec, State DR, Priority 1
Designated Router (ID) 1.1.1.1, Interface address 172.12.12.1
Backup Designated router (ID) 2.2.2.2, Interface address 172.12.12.2
Timer intervals configured, Hello 10, Dead 40, Wait 40, Retransmit 5
oob-resync timeout 40
Hello due in 00:00:05
Supports Link-local Signaling (LLS)
Index 1/1, flood queue length 0
Next 0x0(0)/0x0(0)
Last flood scan length is 1, maximum is 1
Last flood scan time is 0 msec, maximum is 4 msec
Neighbor Count is 1, Adjacent neighbor count is 1
Adjacent with neighbor 2.2.2.2 (Backup Designated Router)
Suppress hello for 0 neighbor(s)
Message digest authentication enabled
Youngest key id is 1
Determining DR and BDR in OSPF Router
In OSPF Routing protocols, Shortest Path First Algorithm (SPF) is used to determine DR and BDR in OSPF Router. When link-state of a Router on the area change. The Router will be send this change (LSA packet) to multicast address 224.0.0.5 (DR and BDR will receive this information). Then DR in the area will flood this change to multicast address 224.0.0.6 to all other routers (DRother). This will help decrease bandwidth in the area which cause is LSA packet. DR and BDR is determined when Routers exchange Hello Packet. DR and BDR is determined by the following steps:
1. Router that have the heighest priority will become DR and the second is BDR. The following command can configure this parameter in the interface mode:
ip ospf priority
2. In multiaccess environments, all routers is connected together by fastethernet interface. By default, the value of Priority of the Routers is equal. In this case, OSPF Router determine the heighest Router ID of any routers as DR and the second as BDR.
To verify DR and BDR, you can execute the following command in EXEC mode:
show ip ospf neighbor
Note: When DR and BDR is defined, the Router do not automatically change DR and BDR regardless the current DR and BDR have lowest Priority or Router ID of value. You can change manually by execute the command in EXEC mode:
clear ip ospf process
type yes to comfirm
I hope these information are help you clearly understand DR and BDR in OSPF Router. Any question is welcome.
How to determine Router ID on Cisco Routers that running OSPF routing
Have threes factors to determine Router ID in OSPF router
1. You can configure manually the Router ID by following command in Router Mode:
router-id A.B.C.D
example: router-id 1.1.1.1
2. If you do not configure manually the Router ID. OSPF Router will determine the Router ID by chosen the heighest IP Address of logical interfaces (loopback interfaces).
3. If haven't any logical interfaces. OSPF Router will chose the heighest IP address of any physical interfaces
Download F-Secure Internet Security 2009 With 3 Months License
Visit this website to download F-Secure Internet Security 2009 with 3 months license.
F-Secure is the name of the company that locate in Sweden.

Aug 17, 2009
Advanced Password Cisco Router Configuration
To secure your router, you need configurable the password on your router. The password must be difficultly to guess. On Cisco Router, you can configure the password for line console, vty (telnet service) and password to access to EXEC mode. In turn, I will show you how to configure the password for three mode as mentioned above.
1. Console port for login local to the Router, the terminator must be attached directly to Router through this console port. To configure password for console port, you must execute the following command in Configuration mode
line console 0
password cisco
login
Password is cisco
2. Line VTY is responsible for enable the Telnet service on the Router. Execute the following command in Configuration mode
line vty 0 4
password cisco
login
To indicate specially the username and password for each user to telnet to the Router, you can configure a username and a password. To do this, execute the follwing command in Configuration Mode:
username thaolv password 0 thaolv
line vty 0 4
login local
exit
After this, you can telnet to this Rotuer by provide your username and password that configured. Here is the username: thaolv and password: thaolv
3. Enabling password for EXEC mode, you must execute the following command in Configuration mode:
enable secret cisco
By default, Password for the EXEC mode is encrypted in MD5 algorithm, Password for the line VTY and the line Console is not encrypted, but you can configure to encrypt these password by following command in Configuration mode:
service password-encryption
Now, your password for the line VTY and the line Console is encrypted in MD7 algorithm. Verify this by execute the following command in EXEC mode:
show running-configR2#show run
Building configuration...
Current configuration : 893 bytes
!
version 12.4
service timestamps debug datetime msec
service timestamps log datetime msec
service password-encryption
!
hostname R2
!
boot-start-marker
boot-end-marker
!
!
no aaa new-model
memory-size iomem 5
!
!
ip cef
!
!
!
username thaolv privilege 15 password 7 09584608160901
!
!
!
interface Loopback0
ip address 2.2.2.2 255.255.255.0
!
interface Serial0/0
ip address 172.16.1.2 255.255.255.252
ip rip receive version 1 2
serial restart-delay 0
clock rate 64000
!
interface Serial0/1
no ip address
shutdown
serial restart-delay 0
!
interface Serial0/2
no ip address
shutdown
serial restart-delay 0
!
interface Serial0/3
no ip address
shutdown
serial restart-delay 0
!
router rip
version 2
passive-interface Loopback0
network 2.0.0.0
network 172.16.0.0
no auto-summary
!
ip http server
!
!
!
!
!
control-plane
!
!
line con 0
line aux 0
line vty 0 4
login local
!
end
Aug 16, 2009
Aug 15, 2009
Flying Without Wings
This song make me happy when i don't know what to do or when i am alone. I always sing this song to make me better. This song really is good song, hearing and feeling thank Westlife
"Flying Without Wings"
[Shane:]
Everybody's looking for that something
One thing that makes it all complete
You'll find it in the strangest places
Places you never knew it could be
Some find it in the face of their children
Some find it in their lover's eyes
Who can deny the joy it brings
When you've found that special thing
You're flying without wings
[Mark:]
Some find it sharing every morning
Some in their solitary lives
You'll find it in the words of others
A simple line can make you laugh or cry
You'll find it in the deepest friendship
The kind you cherish all your life
And when you know how much that means
You've found that special thing
You're flying without wings
So, impossible as they may seem
You've got to fight for every dream
Cos who's to know which one you let go
Would have made you complete
[Shane:]
Well, for me it's waking up beside you
To watch the sunrise on your face
To know that I can say I love you
In any given time or place
[Mark:]
It's little things that only I know
Those are the things that make you mine
And it's like flying without wings
Cos you're my special thing
I'm flying without wings
[Shane:]
And you're the place my life begins
And you'll be where it ends
[Mark:]
I'm flying without wings
And that's the joy you bring
I'm flying without wings
Mac OS X Snow Leopard Theme for Windows 7
I posted many themes for Windows 7 in previous post, such as Ferari theme for Windows 7, Windows 7 Box Art Theme. Today, i introduce Mac OS X Snow Leopard Theme for Windows 7. These themes will only work on Windows 7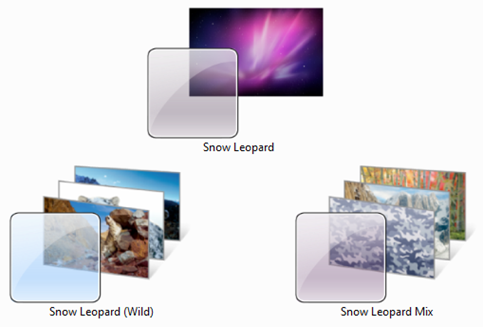
To download you can click link below
Download Mac OS X Snow Leopard Themes Pack for Windows 7
LAB: Basic OSPF Configuration
Today, i will introduce you Basic OSPF Configuration. Topology in this lab:
Today, i will introduce you Basic OSPF Configuration. Topology in this lab:

Task 1: Perform Basic Router Configurations.
Perform basic configuration of the R1, R2, and R3 routers according to the following guidelines:
1. Configure the router hostname.
2. Disable DNS lookup.
3. Configure an EXEC mode password.
4. Configure a message-of-the-day banner.
5. Configure a password for console connections.
6. Configure a password for VTY connections.
Task 2: Configure and Activate Serial and Ethernet Addresses.
Step 1: Configure interfaces on R1, R2, and R3.
Configure the interfaces on the R1, R2, and R3 routers with the IP addresses and banwidth from the table under the Topology Diagram.
Step 2: Verify IP addressing and interfaces.
Use the show ip interface brief command to verify that the IP addressing is correct and
that the interfaces are active.
When you have finished, be sure to save the running configuration to the NVRAM of the router.
Step 3: Configure Ethernet interfaces of PC1, PC2, and PC3.
Configure the Ethernet interfaces of PC1, PC2, and PC3 with the IP addresses and default
gateways from the table under the Topology Diagram.
Step 4: Test the PC configuration by pinging the default gateway from the PC.
Task 3: Configure OSPF on the R1 Router
Task 4: Configure Authentication on out interfaces that used to exchange routing packets
I will configure R1 and other Router is similar configured.
Task1: Basic ConfigurationRouter>en
Task 2: Configure and Activate Serial and Ethernet Addresses.
Router#config terminal
Enter configuration commands, one per line. End with CNTL/Z.
Router(config)#hostname R1
R1(config)#no ip domain-lookup
R1(config)#line console 0
R1(config-line)#password cisco
R1(config-line)#login
R1(config-line)#line vty 0 4
R1(config-line)#password cisco
R1(config-line)#login
R1(config-line)#exit
R1(config)#enable secret cisco
R1(config)#service password-encryption
R1(config)#banner motd #R1 is configured by THAOLV#
Step 1:R1(config)#interface Fa0/0
Step 2: Verify IP addressing and interfaces
R1(config-if)#ip address 172.16.1.17 255.255.255.240
R1(config-if)#no shut
%LINK-5-CHANGED: Interface FastEthernet0/0, changed state to up
%LINEPROTO-5-UPDOWN: Line protocol on Interface FastEthernet0/0, changed state to up
R1(config-if)#interface s0/0/0
R1(config-if)#ip address 192.168.10.1 255.255.255.252
R1(config-if)#no shut
%LINK-5-CHANGED: Interface Serial0/0/0, changed state to down
R1(config-if)#clock rate 64000
R1(config-if)#bandwidth 64
R1(config-if)#interface s0/0/1
R1(config-if)#ip address 192.168.10.5 255.255.255.252
R1(config-if)#no shut
%LINK-5-CHANGED: Interface Serial0/0/1, changed state to down
R1(config-if)#clock rate 64000
R1(config-if)#bandwidth 256R1#show ip interface brief
The status of the S0/0/0 and S0/0/1 are down because it is up when there is a signal impact to it.
Interface IP-Address OK? Method Status Protocol
FastEthernet0/0 172.16.1.17 YES manual up up
FastEthernet0/1 unassigned YES manual administratively down down
Serial0/0/0 192.168.10.1 YES manual down down
Serial0/0/1 192.168.10.5 YES manual down down
Vlan1 unassigned YES manual administratively down down
Step 3 and 4: You can manual configuring, i don't show here
Task 3: Configure OSPF on the R1 RouterR1(config)#router ospf 1
Task 4: Configure authentication
R1(config-router)#network 172.16.1.17 255.255.255.240 area 0
R1(config-router)#network 192.168.10.1 255.255.255.252 area 0
R1(config-router)#network 192.168.10.5 255.255.255.252 area 0
R1(config-router)#passive-interface fa0/0
I will configure authentication on the interface S0/0/0:
Done!R1(config)#interface S0/0/0R1(config-if)#ip ospf message-digest-key 10 md5 PASSWORDR1(config)#router ospf 1R1(config-router)#area 0 authentication message-digest
Download Windows Server 2008 R2 Evaluation (180 days)
Cheer! finally i can download Windows Server 2008 R2 officicaly from Microsoft Technet. Today, everyone that wonder with Windows Server 2008 R2 can download it
To use Windows Server 2008 R2, you need
Component | Requirement |
|---|---|
Processor | Minimum: 1.4 GHz (x64 processor) Note: An Intel Itanium 2 processor is required for Windows Server 2008 for Itanium-Based Systems |
Memory | Minimum: 512 MB RAM Maximum: 8 GB (Foundation) or 32 GB (Standard) or 2 TB (Enterprise, Datacenter, and Itanium-Based Systems) |
Disk Space Requirements | Minimum: 32 GB or greater Foundation: 10 GB or greater Note: Computers with more than 16 GB of RAM will require more disk space for paging, hibernation, and dump files |
Display | Super VGA (800 × 600) or higher resolution monitor |
Other | DVD Drive, Keyboard and Microsoft Mouse (or compatible pointing device), Internet access (fees may apply) |

Windows Server 2008 R2 publish with 64bit edition only and everyone can use up to 180 days without key for activation. So, We need some operation to rearm. To manually rearm the 10 day activation grace period
When the initial 10-day activation period nears its end, you can run the Slmgr.vbs script to reset it back to 10 days. To do this, follow these steps:
# 1. Click Start, and then click Command Prompt.
# 2. Type slmgr.vbs -dli, and then press ENTER to check the current status of your activation period.
# 3. To reset the activation period, type slmgr.vbs –rearm, and then press ENTER.
# 4. Restart the computer.
This resets the activation period to 10 days, and can be used up to five times. After this you will need to either activate or reinstall the evaluation.
To donwload you can click this link: http://technet.microsoft.com/en-us/evalcenter/dd459137.aspx
Note: To download, you must have a hotmail address.
Aug 14, 2009
Download Microsoft Windows Rights Management Services Server and Client with Service Pack 1
Microsoft introduce Windows Rights Management Services in Windows Server 2003 to protect sensitive business e-mail messages and business productivity documents could be shared and used. In Windows Server 2008 it is named Active Directory Rights Management Services (AD RMS). AD RMS is a role of Windows Server 2008 but with Windows Server 2003 it is must downloaded.
You can download Microsoft Windows Rights Management Services at http://www.microsoft.com/downloads/details.aspx?FamilyId=8EF6D80A-6A9C-4FB9-AB51-790980816FFE&displaylang=en and Microsoft Windows Rights Management Service Client at http://www.microsoft.com/downloads/details.aspx?FamilyId=A154648C-881A-41DA-8455-042D7033372B&displaylang=en
How to install and configure AD RMS. I will write in later post.
Using SYSPREP.EXE to Change SID in Windows Server 2008 and Vista
I use VMware Workstration to create Virtual machines. Installing operating system for Virtual Machine is boring. I often clone virtual machine. This make virtual machines have same SID that these VMs do not have ability join domain. In previous version of Windows, we can use NewSID tool. This tool can not use in Windows Server 2008 and later. A new tool become candidate is "SYSPREP.EXE" included in Windows Server 2008 that we can use it by type sysprep in RUN dialog, SYSPREP Preparation Tool appear. If you want to create a new SID, remember to CHECK the “Generalize” checkbox
I use VMware Workstration to create Virtual machines. Installing operating system for Virtual Machine is boring. I often clone virtual machine. This make virtual machines have same SID that these VMs do not have ability join domain. In previous version of Windows, we can use NewSID tool. This tool can not use in Windows Server 2008 and later. A new tool become candidate is "SYSPREP.EXE" included in Windows Server 2008 that we can use it by type sysprep in RUN dialog, SYSPREP Preparation Tool appear. If you want to create a new SID, remember to CHECK the “Generalize” checkbox.
During the following reboot a new SID is automatically generated - and you will have to type in your Product/License Key, provide a new Computer Name, select an Administrator Password etc.
Ferrari Theme for Windows 7 (cool theme)

In previous post, I introduced to you some nice themes for Windows 7. Today, I will show you a nice theme that developed by Microsoft and Ferrari in italy. A Ferrari Desktop theme for Windows 7.
In previous post, I introduced to you some nice themes for Windows 7. Today, I will show you a nice theme that developed by Microsoft and Ferrari in italy. A Ferrari Desktop theme for Windows 7. Although, this theme is not yet officially release, but you can download and enjoy it. You can download here
Aug 13, 2009
Installing Active Directory Certificate Services
In Windows Server 2008, Micorosft introduce many features about Active Directory Services. One of them is Active Directory Certificate Services (ADCS), it is important to understand what, why, when, how to use ADCS. ADCS is the backbone of Microsoft' Public key Infrastructures (PKIs). It will allow you to issue certificates for SSL/TTL user on websites or digitally sign your email.
Now let’s take a look at installing Active Directory Certificate Services.
Certain versions of Server 2008 only allow certain AD CS components to be installed; please take a look at this table for reference:

- CA – issues certificates to users, computers and services while also managing their validity; comes in root and subordinate
- Network Device Enrollment Service – allows network devices (i.e. routers) to request and receive certificates based on Simple Certificate Enrollment Protocol (SCEP)
- Online Responder Service – implements Online Certificate Status Protocol (OCSP) by evaluating certificate status, decoding revocation status requests, and sending back signed responses containing certificate status information
Install Enterprise Certificate Authority on a Windows 2008 Server
In this article, I will show you how to install Enterprise Certificate Authority on a Windows 2008 Server. Although, You should plan to deploy ADCS carefully. There are two types root CA: Enterprise CA and Stand-Alone CA, common we install a Stand-Alone for the root CA and Enterprise CA for Subordinate . But for testing purpose only, i will show you how to install Enterprise Root CA on a Windows Server 2007.The Server is a member of the domain, user is domain admins
1. Open Server Manager.
2. Select Roles, then click Add Roles in the center pane.

3. The Before You Begin page may show up if you haven’t turned it off already. If you see it just click Next.
4. In the Select Server Roles window go ahead and select Active Directory Certificate Services by placing a checkmark next to it, then go ahead and click Next.

5. Now you will see an Introduction to Active Directory Certificate Services, where you can read about the good things you can do with AD CS.
The biggest thing to note here is the following:
Name & Domain settings of this computer cannot be changed after a CA has been installed. If you want to change the computer name, join a domain, or promote this server to a domain controller do so BEFORE install thing the CA.
Now with that warning out of the way, go ahead and click on Next.

6. Next you get to Select Role Services, which can include any of the following depending on what version of Windows Server 2008 you are installing this on — refer to the table above for specifics.
For this install I am going to choose the Certification Authority only.

7. Now comes the Specify Setup Type, and for this I am going to select the Enterprise radio button.

8. For the Specify CA Type, I am going to choose the Root CA radio button and then click Next.

9. In Set Up Private Key, I am going to choose Create a new private key radio button and then select Next.

10. Now you have to Configure Cryptography for CA in this window and there are quite a few to choose from.
Now I am no expert on cryptography, but some basic rules do apply … the longer the key the harder it is to crack. For our purposes I am going to use the following settings:
RSA#Microsoft Software Key Storage Provider
4096 Key Character length
md5 Hash algorithm
Recommend using SHA1 or SHA2 hash algorithm for backward-compability with old versions
Now I am going to click Next.

11. In Configure CA Name you can choose to overwrite the default common name for this CA and also the Distinguished name suffix if you so choose.
I am going to overwrite the default common name with Test-Enterprise-CA, but I will leave the rest alone.

12. Next we will Set Validity Period for this CAs certificate.
Remember a root CA issues itself a certificate. The default is 5 Years so I will just leave it at that. You can change this based on any need you might have in your environment. Click Next.

13. Configure Certificate Database will let you specify where you want to put the database and log files for the CA.
I am going to leave the default in place. Click Next.

14. On the Confirm Installation Selections you can see the answers you have chosen and you will again see a warning that you cannot change the computer name or domain settings for this server after installing the CA.
Go ahead and click Install… you know you want to!

15. After a few minutes you will see the Installation Results, and with any luck you will have the message: Installation succeeded.
After your glow of certificate happiness fades go ahead and click Close.

16. Now let’s go in and take a look by clicking on Certification Authority in Administrative Tools (if you get a UAC pop up just click Ok).

17. Now you can see the snap-in is showing the CA named Test-Enterprise-CA in the left pane with a bunch of folders for certificates.

18. You can also see that if you click the Certificate Templates folder, there are quite a few default templates that are already setup and ready to go.

Summary
Now that we have installed the Active Directory Certificate Services the next step would be to request some certificates and configure them.
The installation for a stand-alone CA is very similar to this. In fact if you are not in a domain and if you are not installing as a domain admin you will not even get the option for an Enterprise CA setup, so if you see that grayed out you now know why.
Aug 12, 2009
What is the difference between OSPF E2 Routes and E1 Routes
 Look at the figure above, when using OSPF dynamic routing, all routers exchange Link-State Packets between each Router. Router A is Autonomous System Border Router (ASBR) because it advertises external link to internal Routers. With RIP, IGRP, EIGRP the external network is in one type, but with OSPF the external network is redistributed by 2 types: E1 and E2
R1#show ip route
Codes: C - connected, S - static, I - IGRP, R - RIP, M - mobile, B - BGP
D - EIGRP, EX - EIGRP external, O - OSPF, IA - OSPF inter area
N1 - OSPF NSSA external type 1, N2 - OSPF NSSA external type 2
E1 - OSPF external type 1, E2 - OSPF external type 2, E - EGP
E2 is the default routes type for routes learned via redistribution. For example, Router C and other routers in the routing domain will learn external networks that Router A redistribute with cost from Router A to external network.
If Router A is configurable with E1. At this time, Router C in the routing domain will learn external networks via Router A with cost is cost of Router C to Router A and Router A to destination network
RA#conf tAfter configure external type 1, the cost from RouterC to External network is larger the cost from RouterC to external network with E2 configuration.
Enter configuration commands, one per line. End with CNTL/Z.
RA(config)#router ospf 1
RA(config-router)#redistribute rip subnets metric-type 1
Aug 11, 2009
Experience on Windows 7 RTM
Yesterday, i installed Windows 7 RTM 64bit by USB. Some people do not believe that can install Windows 7 64bit from USB when computer is running 32bit operating system, please read my previous post to do that. Wow, Windows 7 is very nice and fast, it is faster than Windows Vista. I used Windows 7 from beta version, and now it is RTMed, i really wonder on it. Although, Windows officially released to world wide start at 1, oct, 2009 but many people can download Windows 7 now and using it. This is my screen shot: The theme that i use is downloaded at previous post.
My english is not good, some words or grammar may be wrong, but i believe that you can understand :).
Note: Edit some words or grammar in my post is welcome
Aug 10, 2009
How to check Intel and AMD Hyper-V Compatibility
You probably know that you can install Hyper-V only on a computer that supports Intel’s or AMD’s virtualization technologies (x86 virtualization), i.e. Intel VT and AMD-V. That is, the CPU and the BIOS have to support it. I have already encountered relatively new PCs which have processors with virtualization support, but the BIOS setup doesn’t have an option to enable it. Sometimes it helps to update the BIOS.
 AMD and Intel both offer free tools that allow you to check whether a computer supports hardware virtualization. If you’re unsure, you should use these utilities before you install Hyper-V. They also show whether virtualization is enabled. On most systems it is disabled by default for security reasons. To enable it, you have to change the corresponding BIOS settings. That is, you have to enable hardware virtualization and the NX-bit (AMD) or the XD-bit (Intel) respectively. Hyper-V can be installed without CPU virtualization enabled, but then its hypervisor won’t start and you will find related error messages in the event log.
 Unfortunately, the Intel tool is not 100% reliable. I tried it on a Fujitsu-Siemens server which definitely supported Intel VT, but Intel’s tool reported the opposite. We enabled Intel VT in the BIOS, and Hyper-V is running perfectly on this machine. I don’t know if the AMD tool is also that unreliable because we only have machines with AMD CPUs that don’t support AMD-V.
Please share your experiences with x86 virtualization. Did you have to update the BIOS? Did you also find that detection tools discusses here are a bit unreliable?
AMD Hyper-V System Compatibility Check Utility
Intel Processor Identification Utility
Source: http://4sysops.com/archives/free-detect-intel-and-amd-hyper-v-compatibility/Download Windows Server 2008 R2 (RTM Version)
Next version of microsoft windows server: Microsoft Windows Server 2008 R2 is released to manufactures (RTM) together with Windows 7 RTM.
Download Windows Server 2008 R2 RTM Build 7600.16385 64-bit (x64) Volume Licensing (VL)
Note: Windows Server 2008 R2 only available in 64-bit (x64) flavor.
File Name: 7600.16385.090713-1255_x64fre_server_en-us_VL-GRMSXVOL_EN_DVD.iso
Build:7600.16385.090713-1255
Language: English
Size:2,995,314,688 byte
SHA1:610e774478b8ffe6fa23074d537b27012d6e85b1
MD5: BB00DCD7DB1A4B44CD7BBAA1E0A7E6A6
Torrent: MICROSOFT.WINDOWS.2008.SERVER.R2.7600.16385.RTM.X64.VOLUME.ENGLISH.DVD-WZT.torrent
Aug 9, 2009
Installing, Configuring Exchange 2007 Edge Server (Part 2)
The EdgeSync service glues together the internal Exchange 2007 servers to the perimeter Edge servers. This is achieved whilst retaining the necessary isolation between the two network segments.
In Installing, Configuring Exchange 2007 Edge Server (Part 1) we started the installation of an Exchange 2007 Edge server at the DMZ.
So far we installed the Exchange Edge role on a standalone Windows 2003 server. The server is still not connected to the rest of the Exchange organization running internally. Indeed we could employ Edge as the perimeter server even if we were not running Exchange internally. As is, Edge only requires port 25 communications and the configuration of send/receive connectors, to act as a relay to any SMTP server.
However, quite obviously, Edge also includes special support for running together with an internal Exchange 2007 organization. This functionality is provided by the EdgeSync service. Running on an internal Hub transport server, EdgeSync pushes information to the Edge server. The following is some of the information transferred; more details are available from the article EdgeSync Replication Data:
- Email routing configuration such as the list of accepted domains and connector configuration.
- Recipient information that is especially useful for rejecting emails addressed to invalid recipients.
- Safe Sender lists configured at each of the recipient mailboxes.
Making this information available to the Edge server enables the immediate filtering of emails. Furthermore, once the system is deployed, an Administrator will be able to manage the Edge server from the internal network. Configuration changes are simply pushed by EdgeSync, reducing the need to log on to the Edge server directly.
All this is achieved without compromising the need for isolation. EdgeSync only requires the opening of an additional port at the firewall separating the internal and perimeter networks. This is port 50636, a custom secure LDAP port to which ADAM is listening.
Another point to notice is the fact that information only flows from the internal to the perimeter network and not the other way round. Again this meets our isolation requirements. If the information at the perimeter were to be poisoned, this information would not get propagated internally.
DNS Configuration
Before proceeding further we have to take care of name resolution. Both Edge and internal Hub servers need to be able to resolve each other's name through DNS. For this to work we will add host (A) records for each of the Edge/Hub transport servers.
In a typical DMZ configuration the perimeter and internal networks run on different subnets. In our case we have these settings:
Perimeter subnet: 192.168.0.0/255
Edge Server Name: abcd.exchinbox.local
Edge Server IP: 192.168.0.5
Internal subnet: 192.168.10.0/255
Hub Server Name: exchsrv.exchinbox.local
Hub Server IP: 192.168.10.60
We start from the internal DNS server. This is the one used by the Hub transport. Thus we add an A record for the Edge server named 'abcd'. We add this under the Forward Lookup Zone for exchinbox.local.
We now test name resolution and port 25 connectivity. This telnet command will verify both:telnet abcd 25
Note: If running Windows 2008, install the telnet client from Server Manager | Add Features, select the check box for the Telnet Client and complete the wizard.
Now we move to the perimeter network and create an A record for the Hub named 'exchsrv'. If the perimeter were running its own DNS server, we would create the A record there, as we did for the internal network. Otherwise we just edit the hosts file located under:
Here we add the line:192.168.10.60 exchsrv
We now perform the same telnet test to verify name resolution and connectivity from edge to hub:telnet exchsrv 25
Creating an Edge Subscription
It is now time to setup EdgeSync. This process starts from the edge server machine. At the Exchange Management Shell we run:New-EdgeSubscription -file c:\temp\EdgeSubscription.xml
The file parameter identifies the path where an Edge Subscription XML file is to be created.
On running the command we are greeted with a very informative warning that is worth reading:
"Creating an Edge Subscription makes the configuration of this Edge Transport server ready to be managed via EdgeSync. Any of the following types of objects that were created manually will be deleted: accepted domains; message classifications; remote domains; and Send connectors. Also, the InternalSMTPServers list of the TransportConfig object will be overwritten during the synchronization process. The Exchange Management Shell tasks that manage those types of objects will be locked out on this Edge Transport server. You must manage those objects from inside the organization and allow EdgeSync to update the Edge Transport server. EdgeSync requires that this Edge Transport server is able to resolve the fully qualified domain names (FQDN) of the Hub Transport servers in the Active Directory site to which the Edge Transport server is being subscribed. Those Hub Transport servers must be able to resolve the FQDN of this Edge Transport server. You should complete the Edge Subscription inside the organization in the next "1440" minutes before the bootstrap account expires."
Hitting 'Y' will complete this step and the Edge Subscription file is created. Here is what it looks like:
We now transfer this file to the Hub Transport server. Here at the Exchange Management Console under Organization | Hub Transport we select New Edge Subscription and follow the wizard that opens.
In the introductory step note the checkbox saying:
'Automatically create a Send connector for this Edge Subscription'
This will create the connectors necessary for emails to flow between Edge and Hub transports.
The final wizard step reminds us to open port 50636 for the EdgeSync service to be able to push information to ADAM.
"EdgeSync requires that the Hub Transport servers in Active Directory site Default-First-Site-Name must be able to resolve the IP address for abcd.exchinbox.local, and be able to connect to that host on ports 50636."
Completing the subscription, we can immediately have a look at the new configuration elements that were created. Under Organization | Hub Transport | Edge Subscriptions we find the registration of the 'abcd' server.
Under Organization | Hub Transport |Send Connectors we have two new send connectors:
EdgeSync in Action
In my test environment EdgeSync kicked off immediately and completed the first synchronization. However I did come across reports claiming that the Microsoft Exchange EdgeSync service needed a restart. Don't forget EdgeSync runs at the internal Hub Transport and this is where you will find the service.
Thereafter synchronization will follow a fixed schedule:
Every 1 hour - Configuration information
Every 4 hours - Recipient information
Every 5 minutes - Topology information
We can easily verify whether the first synchronization pushed the expected information to the Edge server. From the Edge server management console, we check the list of accepted domains that were configured internally.
While we are at the Edge server, we can verify if configuration changes were locked as promised earlier on creating the Edge Subscription. Here I tried to edit one of the send connectors and was promptly blocked:
"This task may not be run on an Edge Transport server that is subscribed to an Active Directory site. You must perform this operation on a Hub Transport server in the subscribed Active Directory site. The changes will be replicated to the Edge Transport server when synchronization next occurs."
Now let's see what happens when the configuration changes at the Hub Transport. Here at the "EdgeSync - Inbound to Default-First-Site-Name" Send Connector, I configured exchsrv.exchinbox.local as the smart host to be used by the Edge server for inbound emails.
This change won't be visible to the Edge server until the next synchronization cycle unless we force it to. From the Exchange Management Shell we first run:Test-EdgeSynchronization
This returns a report showing that everything is synchronized except for the SendConnectorStatus.
Next we run:Start-EdgeSynchronization
This will force an immediate synchronization pushing the new Send Connector settings to the Edge. Of course the same cmdlets also come very handy when troubleshooting.
Final Tips
With the Edge Server role, Exchange 2007 provides a good DMZ citizen that is able to satisfy the isolation restrictions imposed by the perimeter network. This is achieved whilst retaining a good level of integration.
EdgeSync provides the necessary link that allows us to manage the Edge server from the internal network. However it is important to understand the work that is going on behind the scene. If new recipient mailboxes are created or a new accepted domain is added, the Edge server won't know of these until synchronization kicks in. If this is an issue, we should force synchronization from the command shell with Start-EdgeSynchronization.
Of course apart for port 25 don't forget to open port 50636 for EdgeSync to work. EdgeSync traffic only flows from the Hub to the Edge transport. Thus we only need port 50636 open at the firewall separating the internal network from the perimeter (in that direction).
One of the areas where I see problems most often is name resolution. The Edge server needs to resolve the names of all hosts it will be interacting with, including those of the internal Hub transport. Same goes for the internal network. Here the Edge server name must also be resolvable through DNS.
Source: http://www.exchangeinbox.com/article.aspx?i=134
Subscribe to:
Posts (Atom)


